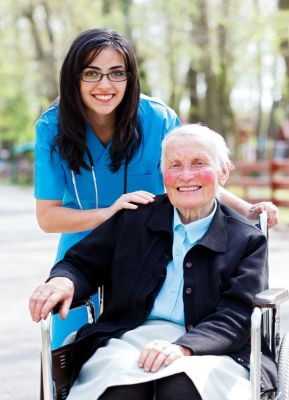
Introduction to Personal Care
What is Personal Care Service?
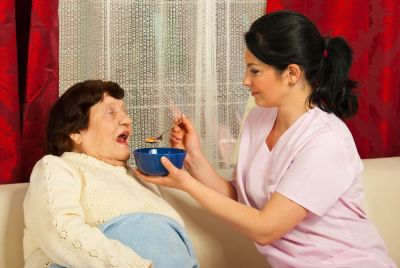
Clients receiving Personal Care Service have conditions that limit their ability to provide basic care for themselves. They may need assistance in the home with bathing, dressing, feeding and other activities of daily living including assistance with household cleaning and the maintenance of a safe home.
Who qualifies for Personal Care Service?
Clients living at home who are unable to independently meet their own personal care needs and have a physician's order for the care.
Who pays for Personal Care Service?
The Waiver Program pays for Personal Care Services when the care is "medically necessary" and ordered by the Client’s physician.
What is a Caregiver?
A caregiver is someone who has been specially trained to perform or assist with Personal Care needs under the supervision of a Field Supervisor.

What are Personal Care needs?
Personal Care refers to the activities most healthy individuals provide for themselves every day.
Who needs assistance?
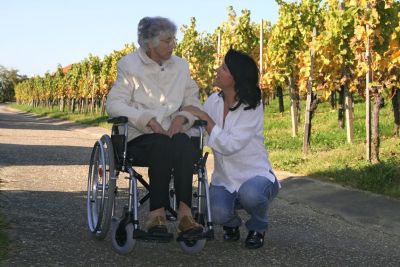
Clients receiving Personal Care Services are either elderly or adults with disabilities who wish to remain at home instead of going to a nursing home. All Clients will have certain functional limitations preventing them from being independent with their own personal care. Sometimes Clients are very frustrated, depressed or even angry at their lack of independence.

Where is the Personal Care Service provided?
Personal Care is provided in the Client’s home. A Care Plan will tell you the location where the care is to be provided. It is important to remember that you are a guest in the Client’s home and you must be respectful of his /her home and personal belongings.
How will I know what care to provide for a Client?
You will be provided with a Care Plan that tells you exactly which tasks to perform, observe or assist the Client with. The Care Plan will also specify when you are to provide the care and how long you are to be in the home. The Field Supervisor will make a visit every month to make sure the Client’s personal care needs are being met and that the plan of care is being followed. During this visit, the Field Supervisor will also conduct an evaluation to see if any changes are needed in the Care Plan.
What are some things that Caregivers cannot do?
- Do not give medications.
- Do not take orders from a doctor.
- Do not perform any procedure that you have not been qualified for.
- Do not accept money or gifts from Clients.
- Do not discuss any Client information with anyone but your supervisor.

Who makes the assignments?
Your supervisor will make out a Care Plan that will tell exactly which tasks to perform, observe, or assist the Client with. It is very important to follow the Care Plan exactly and if you do not understand something, please ask questions.
Special Qualities Required for Caregivers
In addition to completion of an approved course, a Caregiver needs special personal characteristics such as:
- A sincere interest in working with people
- A respectful attitude
- Respect for the privacy of others
- Respect for other people's property
- A belief in the dignity of each person
- An ability to control one's emotions
- Honesty, reliability and dependability
- Ability to work independently
- Willingness to accept direction and ability to follow directions
- Cheerful and sensitive nature
- A clean and neat appearance
- Good health — this job involves a lot of walking, as well as some lifting.
- Good communication skills

Tips for Caregivers
- Follow your Care Plan task for task.
- Do not attempt anything that you have not been checked off on.
- Ask your supervisor if you are unsure how to perform a task or fill out a Caregiver note.
- Notify the supervisor if you are going to be late, or unable to provide your tasks.
- Notify your supervisor if you observe any unusual behaviors or changes in the Client's condition.
- Speak to the Client and family in a polite and calm manner. Explain what you are going to do before you get started.
- Involve the Client in their care.
- Get help from your supervisor with difficult Clients and families. Never argue with the Client, another Caregiver, or any member of their family.
- Dress neatly and wear clean scrubs every day.
- Bathe daily and use an unscented deodorant, with little or no perfume.
- Brush your teeth and use mouthwash as needed.
- Keep your nails cut short and filed smoothly.
- Avoid wearing a lot of jewelry such as earrings, bracelets, pendants and large rings.
- Wear clean comfortable low-heeled shoes.
- Keep yourself healthy by eating properly and getting plenty of rest.
- Use proper body mechanics to protect yourself and the Client from injury.
- Practice good hand washing to avoid the spread of infection.
- Never accept gifts or money from Clients or their families.


Communication
Communication occurs when one person sends a message of information, idea or emotion to another person. Good communication requires us to be skillful at sending and receiving messages. Although speech is the most common method of communication, nonverbal messages are also forms of communication.
Sending the message is only half of the process. If the person receiving the message cannot understand the message, it is of no value to them. It is important to use the communication method best suited for the person receiving the message.
Listening and receiving the message is the other half of the process. It is important to listen with your ears and eyes.
What is the person saying? What is he doing while he is talking? Does he make eye contact? Does he look nervous? Angry? Sad? Happy? Confused?
Listen to what each Client is saying, instead of thinking about what you are going to say next. A good listener has patience and asks questions when they do not understand what is said.
Communication Exercises (Practice responding to the following situations)
Examples
"Do you know Mrs. Jones down the street? I think she has a Caregiver too. Is she going to have to go to the nursing home?"
Possible response: “Yes I do know Mrs. Jones, but according to today’s laws, I am not allowed to discuss that.”
"I'm glad you were the one to come today. I don't like that other girl. I think she stole my ring."
Possible response: “I’m glad I am here today, too. What makes you think the other girl stole your ring? Would you like for me to report that to your Case Manager?”

Tips for Good Communicators
- Call the person you are talking to by their name.
- Maintain eye contact.
- Speak clearly and slowly.
- Eliminate background noises (TV, radio, other people talking, etc.) whenever possible.
- Listen to what the person is saying.
- Ask questions.
- Respond with, "What I hear you saying is…”.
- Be patient, especially when communicating with someone who is hard of hearing or has difficulty understanding speech.
- Always remain in emotional control.
- Never argue with a Client or their family members.
- Be polite and courteous.
- Avoid statements such as, "You did…," "You make me…,” or "You always….".
- When reporting an observation or occurrence stick to the facts.
- Avoid adding statements that are your opinion.

Dealing with Difficult People
Sometimes a Client's behavior and attitude may change during an illness. The Client may respond to stressful situations by becoming angry, withdrawing, or crying easily. Fear is often the underlying emotion when a person reacts in an angry or irritable way.
Remember the following tips for dealing with difficult people:
- Remain in control of your emotions.
- Respond with a calm even tone of voice.
- Recognize the person's anger.
"It sounds like that really upset you.“
"I understand that you feel angry about this situation." - Ask open-ended questions.
"What happened that upset you?”
"How do you feel about this?" - Show an interest in finding a solution to the problem.
"What can I do to help?"
"What is it that you want me to do?”
"Would you like to talk to my supervisor?" - Contact your supervisor for help in resolving problems.
- Document clearly what happened, what you did about it, and who you talked to about the situation.
- Avoid judgment or accusations.
General Tips for Communicating with Persons with Hearing Difficulties
Always face the person when you are talking to them. Try to keep your hands away from your face so they can see your lips and your expressions. Try to sit close to the person you are talking to.
You do not need to talk loud or shout. Talk clearly, without mumbling, and try not to talk too fast.
Make sure there is adequate light in the room. Most people with hearing difficulties rely on seeing the person talking to them to help them communicate.
Turn the radio or television down or off. Background noise is a major hindrance for people who have hearing difficulties. Ambient noise from an air conditioner or fan can make it difficult for someone with a hearing difficulty even when persons with normal hearing do not notice it.
While all of us struggle to communicate effectively, persons with a hearing loss face a difficult challenge understanding what is being said when others do not recognize there is a problem.

Vital Signs
Vital Signs are the measurement of temperature, pulse, respiration and blood pressure, which indicates the functioning of body systems and may help the health care workers to identify numerous types of problems. The Caregiver should wash their hands before and after any procedures. The Caregiver should wear gloves when assessing the Client’s temperature orally and rectally.

Transfers and Mobility
Using Proper Body Mechanics
- As a Caregiver, you will be doing a lot of walking and lifting of Clients. It is your responsibility to use good body mechanics to prevent injury to yourself and the Client. Good body mechanics involves standing and moving your body in such a way as to prevent injury.
- Using good body mechanics will also help you to feel less tired at the end of the day.
- Make sure client has shoes/slippers on.
- Stand with your feet 10 to 12 inches apart. This makes your base of support larger and helps you to keep your balance.
- When moving or assisting a Client from one place to another, support their pelvic area. The pelvic area is the center of gravity. By holding a Client close to their center of gravity, you will have a greater amount of control, with the least amount of effort.
- When lifting heavy objects, spread your feet apart and bend your knees. This will increase your stability, and improve your balance. Generally, the muscles that bend are the strongest.
- You should use your strongest muscles when doing heavy work.
- The strongest muscles are not in your back. The strongest muscles are in your arms and legs.
- Bend your hips and knees slightly and lift with your palms facing up. This puts your muscles in the best position to do heavy work.
- Use good posture.
- Keep your back straight, your knees bent, and your weight distributed evenly.

Toileting
Urinary System
Elimination of waste from the body is important to maintain health and function. Urine is liquid waste that is produced in the kidneys. The urine travels down a tube called a ureter to the bladder where it is held until it is eliminated. When the bladder is full, the brain signals the muscles of the urinary tract to release urine from the body. The urine travels from the bladder down another tube called the urethra until it reaches the outside of the body.
A catheter is a tube inserted in the urethra to drain the urine from the bladder. The urine is collected in a drainage bag outside the body. It is important that the urine in the bag not be allowed to backup because this may send urine back into the bladder causing an infection.
Always keep the bag lower than the bladder.
Notify your nurse supervisor immediately if:
- The catheter comes out.
- There is blood in the urine.
- There is no urine in the bag.
- Catheter is not in place upon arrival to the home.
- Catheter is pulled out while caring for the Client.
- Urine is leaking around the catheter.
- Client is reporting pain.
- Client is running a fever of 101 degrees or greater.
- Never insert, reinsert, remove, or irritate a catheter.
An incontinent person is unable to control the passage of urine out of his/her body. It is very important that incontinent Clients are kept clean and dry to prevent skin breakdown. When assisting a Client with voiding, make the following observations:
- How often does the Client urinate?
- What is the color of the urine?
- Does the urine have a strong or unpleasant odor?
Gastrointestinal System
Feces are solid or liquid waste produced from the breakdown of food in the body. Digestion begins in the mouth where food is chewed and mixed with saliva. The food travels down a long tube called the esophagus into the stomach. The food travels from the stomach into the small intestine where digestive juices finish the job of breaking down the food.
Incontinence means that a person is unable to control the emptying of their bowels. These Clients may wear adult diapers or have special pads on their bed. Incontinent Clients require frequent cleaning and changing since fecal material is very harsh on the skin.
Constipation occurs when the Client has hard feces and/or it is difficult to expel bowel movements. Toileting is normally a private matter. Clients may be embarrassed at needing assistance.
When you assist a Client with toileting, observe the following:
- How often does the Client have a bowel movement?
- Is the bowel movement solid or liquid?
- What is the color? Is there blood present?
- Does the Client complain of pain?
- Document when the Client has a bowel movement and report any problems to your supervisor.
Assisting with Toiling
Always wash your hands before and after assisting an Client with toileting.
Assist the Client with hand washing if they need help.
Always clean the Client from front to back.
Use good body mechanics and safety precautions when helping the Client get in and out of the bathroom.
Bedpan
- Assemble equipment. (bedpan, tissue, wash basin with cloth, talcum powder or cornstarch, non-sterile gloves).
- Wash your hands. Put on the gloves.
- Warm the bedpan by running warm water inside it and along the rim. Dry the bedpan with paper towels and put talcum powder or cornstarch on the part that touches the Client.
- If possible raise the bed and lower the side rails on the side where you are standing.
- Remove covers that are in the way. Raise Client's gown, but keep the lower part of the body covered with the top sheets.
- If possible, ask the Client to bend their knees and place their feet flat on the mattress. Ask the Client to raise their buttocks. Place the bedpan in position with seat of the bedpan under the buttocks. If the Client is unable to lift their buttocks to get on and off the pan, turn the Client on his side with his back to you. Place the bedpan against the buttocks and turn the Client back onto the bedpan.
- Place toilet tissue within easy reach. Ask the Client to signal when he is finished. Raise side rails and provide the Client with privacy.
- Remove the bedpan when Client is finished. If Client is unable to clean himself, turn the Client on his side. Clean the anal area with toilet tissue from front to back. Always wear gloves when cleaning a Client.
- Take the bedpan to the bathroom.
- Change gloves and assist the Client to wash his/her.
- Position the Client comfortably.
- Note the bowel movement for color, amount, and odor. Clean bedpan and put away.
- Remove gloves. Wash your hands.
Bedside Commode (Sometimes called a “potty chair”)
- Wash hands.
- Assemble equipment (bedside commode, toilet tissue, and gloves).
- Using proper body mechanics, assist Client to transfer onto bedside commode.
- Provide toilet tissue within easy reach.
- If possible, allow for privacy. If Client is weak and frail, do not leave Client unattended.
- If Client needs assistance with cleaning, put on non-sterile gloves and clean anal area with toilet tissue wiping from front to back.
- Offer Client soap and water to clean their hands.
- Using proper body mechanics, assist Client off of the bedside commode and back to their bed or chair.
- Observe urine or bowel movement for color, amount, and odor.
- Empty and clean bedside commode using an appropriate disinfectant.
- Remove gloves.
- Wash hands.
- Document.

Providing Personal Care
An important part of your job is to help the Client be as independent as possible. This means teaching Clients to care for themselves, and encouraging them to get back into old routines of self-care as soon as they have the strength if they are able to accomplish this.
Before you begin any procedure or task, explain to the Client exactly what you will be doing. Ask if they would like to use the bathroom or bedpan first. Provide the Client with privacy and let them make as many decisions as possible about when, where, and how a procedure will be done.
The Skin
The skin is our largest body system and does several jobs.
The skin protects our internal organs from injury and infection by providing a barrier. Oil glands secrete an oily substance that keeps the skin lubricated and provides a protective film.
The skin helps regulate body temperature by controlling the loss of heat from the body. Sweating or perspiring is a mechanism that the skin uses to cool the body. Chill bumps are the method the body uses to retain heat.
- The skin loses natural oils, which causes it to become dry.
- The skin loses the under layer of fat, which causes it to become thin and fragile.
- The skin loses the ability to sense temperature. This places an elderly person at risk for burns from water that is too hot.
- Circulation or blood flow to the skin is decreased which makes it harder for wounds to heal.
Skin breakdown is caused by pressure, friction, and shearing. Pressure sores occur when a person sits or lies on a bony prominence. A bony prominence is an area where the bones are close to the skin surface. These areas have a thin layer of skin and a decreased blood flow. Pressure is exerted from the body's weight against the bone, which causes the tissue to become pressed between the bone and another surface (bed, chair, catheter, body part etc).
Decubitus Ulcers
Decubitus ulcers are areas where the skin has been injured due to pressure, friction, or shearing. Decubiti are often referred to as bedsores because they often occur in bed bound Clients. When Client is confined to a bed or chair; the weight of their body puts pressure on the skin over their bony prominence. Pressure causes a decrease in blood flow or circulation to these areas. As a result, a decubitus is formed.
Signs of Decubiti:
- Redness, warmth, tenderness, burning, pale or white skin
- Blister(s)
- Open wound
- Prevention is the best treatment for decubiti. The following guidelines will help in preventing decubiti by providing good skin care.
Change positions every two hours or more frequently if needed.
- Keep skin clean and dry. Incontinent Clients should never be allowed to remain in urine or feces. Wash skin using mild soap. Rinse thoroughly and blot dry.
- Use lotion to massage dry, bony areas. (If the skin is red, do not massage until normal skin color returns.) Massage soothes and stimulates the skin. Always wipe off excess lotion and do not leave the skin moist.
- Keep linens clean, dry, and free of wrinkles. Remove crumbs or other hard objects from the bed. Do not let the Client lie on catheter tubing.
- Use pressure-relieving devices (alternating pressure mattress, sheepskin, elbow, knee, and heel pads).
- Encourage the Client to drink plenty of fluids and eat a well balanced diet.
- Observe skin for problems during the bath time.
- Report any redness, blisters, skin tears, tenderness, bruises, or changes in skin color to your supervisor.
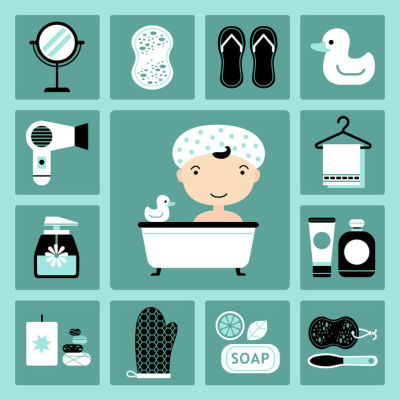
Giving a Bed Bath
Giving a bath cleans the Client's skin, stimulates circulation, and allows time for observing the condition of the skin. Many Clients will be able to assist with their bath and may choose to get in the tub or shower. The amount of assistance they require will vary from Client to Client. A bed bath is reserved for those Clients who are too ill or weak to get in the tub or shower.
Perineal care refers to washing and drying thoroughly of the genital area. The female genital area includes the urinary opening, the vagina, and the rectum. The male genital area includes the penis, scrotum and rectum. When a Client is incontinent, he/she cannot control his/her bowel and or bladder. Urine or stool on the skin can cause skin break down to occur.
Procedure
- Explain to the Client who you are and what you are going to do.
- Wash your hands and put on non-sterile gloves.
- Gather supplies and place on a clean area near the bed (basin, soap, washcloth, towels, clean clothes, lotion, bath blanket).
- If possible, raise bed to a comfortable working position and lower side rail nearest to you.
- Remove bedspread and blanket, place on chair.
- Place a clean sheet or blanket over top sheet for Client privacy. Remove soiled sheet and place in dirty laundry.
- Remove Client's gown/pajamas.
- Offer the Client a washcloth to wash their face if they are able. If the Client is unable to wash their own face, make a mitten by folding washcloth around your hand. Begin by washing the eyelid from the inner side to the outer side of the eye. Rinse and dry by patting with a towel. Wash the face and neck then rinse and dry.
- Place a towel under the arm farthest away from you. (This keeps the bed from getting wet). Place the palm of your hand under the Client's elbow for support and begin washing the shoulder, arm and armpit. Rinse and dry the area well.
- Place the Client's hand in the basin of water and let it soak. Wash, rinse and dry the hands well. Clean the fingernails.
- Wash rinse and dry the other arm, hands, and shoulder in the same way.
- Place a towel across the chest, wash rinse and dry the ears, neck and chest. (Note the condition of the skin under the breasts especially in female Clients).
- Wash, rinse and dry the abdomen. Clean and observe any skin folds, creases. Cover the abdomen and chest with a bath blanket or sheet.
- Empty the dirty water. Rinse the basin and refill it with warm water.
- Uncover the leg farthest away from you. Place a towel under the leg and foot. Bend the knee, wash, rinse and dry the leg and foot. Clean the feet well and examine the condition of the skin between the toes. Look for redness and cracking of skin.
- Wash, rinse, and dry the opposite leg and foot in the same manner.
- Empty the basin, refill with clean water.
- Position the Client on his/her side with the back toward you. Place a towel on the bottom sheet near the Client's back. Wash, rinse, and dry the back of the neck, back and buttocks. Give the Client a backrub with lotion. Observe for reddened or broken areas of skin. Remove the towel.
- Position Client on his/her back. Offer the Client a soapy washcloth to wash the genital area. Give a clean wet washcloth for rinsing and a towel for drying. If the Client is unable to do this, wash the Client's genital area. Remember to clean from front to back. Maintain privacy at all times.
- Put clean clothes on the Client.
- Position the Client safely and comfortably in the bed.
- Clean equipment and put it away. Remove gloves and wash your hands.
- Document on the aide note that you gave a bed bath. Document any observations.
Assisting with a tub bath or shower
Never leave a Client alone while in the bathtub.
Never use bath oils. They make the tub slippery and can cause a fall.
Equipment needed: wash cloth, soap, bath towel, deodorant, body lotion, bath mat, chair, Client's clothing
Procedure:
- Explain to the Client who you are and what you are going to do.
- Clean the tub or shower if needed.
- Check to see that all electrical appliances are removed from the bathroom.
- If a Client’s bathroom already has grab bars, check the grab bars for stability.
- Wash your hands. Gather equipment. Put on non-sterile gloves, if there is a chance that you will have contact with blood or other body fluids.
- Using proper body mechanics, assist the Client into the bathroom.
- Fill the bathtub half full with warm water. Test the water for temperature. If assisting with shower, turn on the shower and adjust the water temperature for a warm, gentle flow.
- Assist the Client with undressing and getting into the bathtub. If assisting with a shower, help Client into shower or onto shower chair.
- Assist the Client with washing as needed. Client may also choose to shampoo his/her hair at this time.
- When the Client has finished washing, turn off the water and empty the tub.
- Assist the Client out of the tub or shower.
- Assist the Client in drying his body with a towel and putting on deodorant, powder or lotion. Assist with getting dressed in clean clothes.
- Assist the Client out of the bathroom to a bed or chair.
- Clean the bathroom. Place dirty linen in the laundry.
- Remove gloves and wash hands.
- Document that you completed a tub bath or shower bath. Note any observation about the Client's condition.

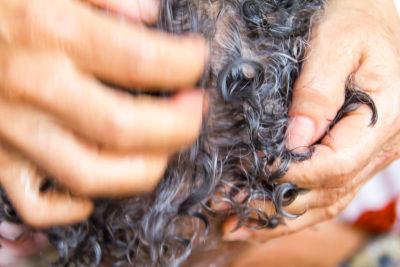
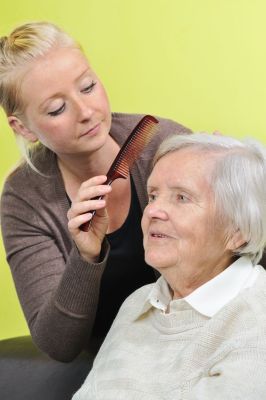
Shampooing the Hair
A shampoo cleans the hair and scalp, improves circulation to the scalp, and improves the Client's appearance. As a Caregiver, you may be asked to assist Clients with shampooing their hair.
Grooming is brushing the teeth, combing the hair and shaving.
Shampooing the Hair in the Shower:
- Assemble the equipment needed. (shampoo, conditioner, towel, wash cloth, cotton balls)
- Explain to the Client what you are about to do.
- Wash your hands and put on non-sterile gloves.
- Assist the Client into the shower. Some Clients will have a shower chair that they sit on while they are showering.
- Offer cotton balls to the Client to protect their ears.
- Assist the Client as needed to wet the hair, apply shampoo, rinse, apply conditioner and rinse. The amount of assistance needed will vary from Client to Client. Some Clients may only need supervision to prevent them from falling. Others will need you to actually shampoo their hair.
- Wrap the Client's hair in a towel and assist them out of the shower and onto a chair. Towel dry the hair as much as possible.
- You may finish drying the hair with a blow dryer if the Client requests. Be careful to not burn the scalp by holding the hair dryer to close to the head or setting the temperature too hot.
- Remember to use the blow dryer away from water.
- Comb and style the Client's hair in the style that they prefer.
- Clean the used equipment and the bathroom area.
- Remove gloves and wash your hands.
- Document that you completed a shampoo in the shower.
Procedure for a Bed Shampoo:
- Equipment needed: comb, brush, shampoo, conditioner, shampoo kit with plastic cover, basin to collect dirty water, containers of warm water, towels, wash cloth, cotton balls.
- Explain to the Client what you are about to do.
- Wash your hands and put on gloves. Gather equipment.
- Raise the bed to the highest position. Position the Client flat in bed. Lower the side rail and position a chair next to the head of the bed.
- Inspect the Client's hair for knots, nits and lice. Comb the knots out carefully. If the Client has nits and lice, report this to your supervisor immediately. Ask for instructions before proceeding further with the shampoo.
- Place a towel on the chair and place the basin on the towel.
- Remove the pillow from under the Client's head. Protect the bed by placing a towel under the Client's head.
- Offer small pieces of cotton to place in the Client's ears for protection.
- Place the shampoo kit under the Client's head with the sleeve (open end) positioned to empty into the basin. Ask the Client to hold the wash cloth over their eyes.
- Wet the Client's hair by using a pitcher to pour water over the hair.
- Apply shampoo and work into a lather. Use both hands to wash the hair and massage the scalp.
- Rinse the shampoo off by pouring water over the hair. Repeat this until the hair is free of soap.
- If the Client uses a conditioner, apply it according to the instructions on the label and rinse thoroughly.
- Dry the Client's forehead and ears and remove cotton from their ears. Raise the Client’s head and towel dry the hair. Follow the blow dry instructions if using a hair dryer to dry the hair.
- Remove the shampoo kit from the bedside. Position the Client comfortably with the bed in low position and with the side rails up.
- Remove gloves, and wash your hands.
- Document that you gave a bed shampoo.
Making a Shampoo Kit
- Roll each towel and put one inside the three closed sides of the bag.
- Place the bottom rolled edge under the Client’s neck (if not contradicted).
- Place the open end into a basin and follow the procedure above for a bed shampoo.
Procedure for a Sink Shampoo:
- Equipment needed: shampoo, conditioner, towels, wash cloth, pitchers of warm water, comb, brush, cotton balls.
- Explain to the Client what you are about to do.
- Wash your hands and put on non-sterile gloves.
- Gather equipment. Place a chair in front of the sink for the Client to sit on.
- Assist the Client to the sink. Place a towel around the shoulders to protect his back from getting wet.
- Assist the Client to comb out any knots in the hair. Inspect the hair for lice or scalp problems. If the Client has nits or lice, stop the shampoo and notify your supervisor. Ask for instructions before proceeding further with the shampoo.
- Offer cotton to place cotton in their ears for protection.
- Give the Client a washcloth to cover their eyes.
- Ask the Client to lean forward with their head over the sink. Pour the pitcher of warm water over the hair to wet it thoroughly.
- Dry the forehead and ears. Wrap the Client's hair in a towel and assist them to a comfortable sitting position. Remove cotton in ears.
- Towel dry the hair as much as possible. You may use a blow dryer to finish drying the hair if the Client requests.
- Remember to keep the hair dryer set at a comfortable temperature and to keep the dryer at a comfortable distance from the scalp in order to prevent a burn.
- Remember to keep the blow dryer away from the water.
- Comb or brush the hair in the style the Client is accustomed to. Assist the Client out of the bathroom. Clean any used equipment and the bathroom area.
- Remove gloves and wash your hands.
- Document that you completed a shampoo at the sink.
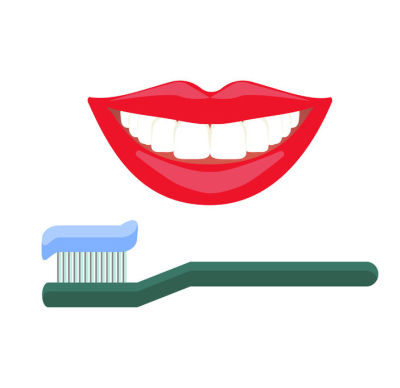
Oral Hygiene
Oral hygiene or mouth care is the cleaning of the mouth, gums, tongue and teeth or dentures.
Oral care does the following:
- Removes food and debris from around the teeth and gums.
- Prevents infection.
- Prevents mouth odors.
- Refreshes the Client and improves comfort.
- Stimulates circulation in the mouth.
- Makes food taste better, improves the appetite.
- Provides an opportunity to observe for signs of irritation, sores, and pain.
Equipment needed: water, cup, emesis basin, towel, toothbrush, toothpaste, mouthwash.
Procedure:
- Explain the procedure to the Client.
- Wash hands and put on non-sterile gloves.
- Gather equipment.
- Assist the Client to an upright position; place a towel across the chest.
- Offer the Client water to rinse the mouth, place emesis basin under chin and allow Client to spit out the water.
- Wet the toothbrush, apply toothpaste and offer the toothbrush to the Client. If the Client is unable to brush his own teeth, brush his teeth with a gentle circular motion starting above the gum line. If the Client wears dentures, assist the Client in removing the dentures. Hold the dentures securely over the sink and brush with toothbrush/ toothpaste until they are clean. Rinse the dentures with cool water, place in denture cup and soak in cool water, soaking solution or mouthwash and water.
- Rinse their mouth with water. Offer mouthwash if requested. If the Client wears dentures, assist with replacing dentures in their mouth. If the Client does not wish to replace dentures, leave them in a denture cup with cleaning solution.
- Clean and put away equipment.
- Remove gloves and wash hands.
- Document that you performed or assisted with oral care. Note any observations about the gums, teeth, sores, pain etc.
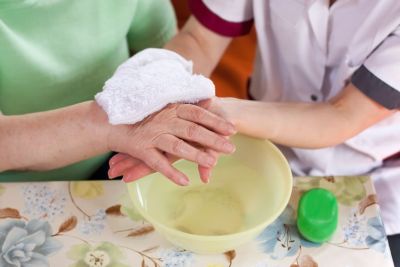
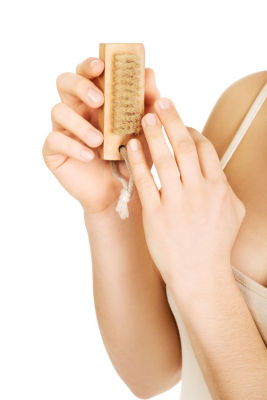
Nail Care
Personal care aides may be asked to assist with cleaning and filing a Client's fingernails and toenails. This procedure helps keep the nails clean, prevents abrasions from scratching, and improves the Client's appearance. Remember, you are not allowed to cut or trim an Client's fingernails or toenails. If a Client's nails need trimming, notify your supervisor.
Procedure:
- Nail care may be done during bath time.
- You will need a basin with warm water, soap, wash cloth, towel, nail file.
- Explain to the Client what you are going to do.
- Remove socks or stockings. Observe the feet for signs of pressure, abrasions, or infections.
- Place the hands or feet in the basin of warm soapy water.
- Allow the hands or feet to soak 10 minutes. If it is not possible to soak the hands or feet, clean them using a wash cloth.
- Be sure to clean between fingers and or between toes.
- Use a towel to dry the hands or feet. Dry between the fingers and toes. Using a nail file, file the nails straight across. Jagged or pointed edges will cause abrasions to the skin.
- If the Client's nails are long, notify your supervisor. DO NOT TRIM THE NAILS.
- Apply lotion if requested. Help the Client to put on clean socks or stockings.
- Clean and put away equipment. Wash your hands.
- Document that you provided nail care and note any observations that you made about the Client’s nails or skin.
Shaving a Client
A clean-shaven face adds to the Client's comfort and well-being. Some Clients may be able to shave themselves with minimal assistance. They may require assistance getting up in a chair or gathering equipment. Other Clients may need you to shave them. They may use a disposable razor or an electric razor. Electric razors are safer and easier to use; however they should not be used while Clients are receiving oxygen.
Certain Clients may not be permitted to shave or be shaved. Never shave a Client unless you have been instructed to do so by your supervisor. This procedure is for shaving a Client with a disposable razor.
Equipment needed: basin of hot water, shaving cream, disposable razor, towel, wash cloth, aftershave, and powder.
Procedure:
- Wash hands and put on non-sterile gloves.
- Assist the Client to an upright, comfortable
- Place a towel over the chest to protect clothes or pajamas.
- Use a disposable razor. Fill basin half full of hot water.
- Place warm wet washcloth on the face to soften the beard.
- Apply soap or shaving cream from below the sideburns to underside of jaw.
- Use the fingers of one hand to pull the skin in the opposite direction of the blade. This holds the skin tight and prevents cuts.
- Use the other hand to hold the razor at a 45-degree angle. Begin shaving in the direction the hair grows.
- Use short firm strokes. Begin under the sideburns and work downward over the cheeks. Continue over the chin. Work upward on the neck under the chin.
- Rinse the razor frequently in the basin of water.
- Rinse and dry the face. Apply lotions and makeup according to Client preference.
- Clean and put away equipment.
- Remove gloves and wash hands.
- Document that you completed shaving the Client. Note any cuts or irritations to the skin.

Dressing a Client
Personal Care Aides may be asked to assist Clients with dressing. The amount of assistance needed will depend on the Client’s condition and limitations. Your Care Plan will tell you whether or not you will need to assist the Client with dressing. Some Clients may have an occupational therapist working with them. The therapist may be trying to encourage independence with dressing.
Procedure:
- Explain to the Client what you are going to do. Ask them which clothes they would like to wear.
- Place the clothes and any adaptive devices within easy reach of the Client. Wash your hands.
- Dressing is usually done after the Client’s bath. Assist the Client to a sitting position if possible. If the Client must remain in bed, assist them to a flat position on their back. Keep the Client covered.
- Put on underwear, pants, or pajamas. Always start by putting the clothing on the weak or injured side first, followed by the other side.
- If the Client is able to stand, pull the pants up when the Client is in a standing position.
- If the Client is confined to the bed, ask them to lift their buttocks so you can pull the pants up. When using an over-the-head shirt or blouse, place the shirt on the injured arm first. Bring the shirt over the head, and then guide the other arm into the shirt. If you are using a button-down shirt, place the injured arm in the shirt, then bring the shirt around the back and guide the other arm into the shirt.
- Support the Client’s joints as you assist with putting on socks and shoes.
- Position the Client comfortably.
- Wash your hands.
- Document that you assisted with dressing and note any observations that you made.
Remember to allow the Client to assist with dressing as much as they are able.